Reloading API code in Docker container
Updating Dockerfile to use requirements.txt
This is the Dockerfile as we've got it:
FROM python:3.10
EXPOSE 5000
WORKDIR /app
RUN pip install flask
COPY . .
CMD ["flask", "run", "--host", "0.0.0.0"]
But there is a problem! It doesn't use the requirements.txt, so it only installs Flask as a dependency.
We want to add requirements.txt and install the dependencies from it. You might be tempted to move the COPY line above the RUN line, and then install it with pip install -r requirements.txt.
But there's a better way!
FROM python:3.10
EXPOSE 5000
WORKDIR /app
COPY ./requirements.txt requirements.txt
RUN pip install --no-cache-dir --upgrade -r requirements.txt
COPY . .
CMD ["flask", "run", "--host", "0.0.0.0"]
Here we:
- Add a new
COPYline that copies therequirements.txtfile into the image. This creates a new cached layer, so that if therequirements.txtfile doesn't change, this line and the followingRUNline don't run again. - Change the
pip installcode to use--no-cache-dir --upgrade. This makes sure that we don't use any pre-existing pip caches when installing, and also upgrades libraries to the latest version if necessary.
Running the container with volumes for hot reloading
Up to now, we've been re-building the Docker image and re-running the container each time we make a code change.
This is a bit of a time sink, and a bit annoying to do! Let's do it so that the Docker container runs the code that we're editing. That way, when we make a change to the code, the Flask app should restart and use the new code.
All we have to do is:
- Build the Docker image
- Run the image, but replace the contents of the image's
/appdirectory (where the code is) by the contents of our source code folder in the host machine.
So, first build the Docker image:
docker build -t flask-smorest-api .
Once that's done, the image has an /app directory which contains the source code as it was copied from the host machine during the build stage.
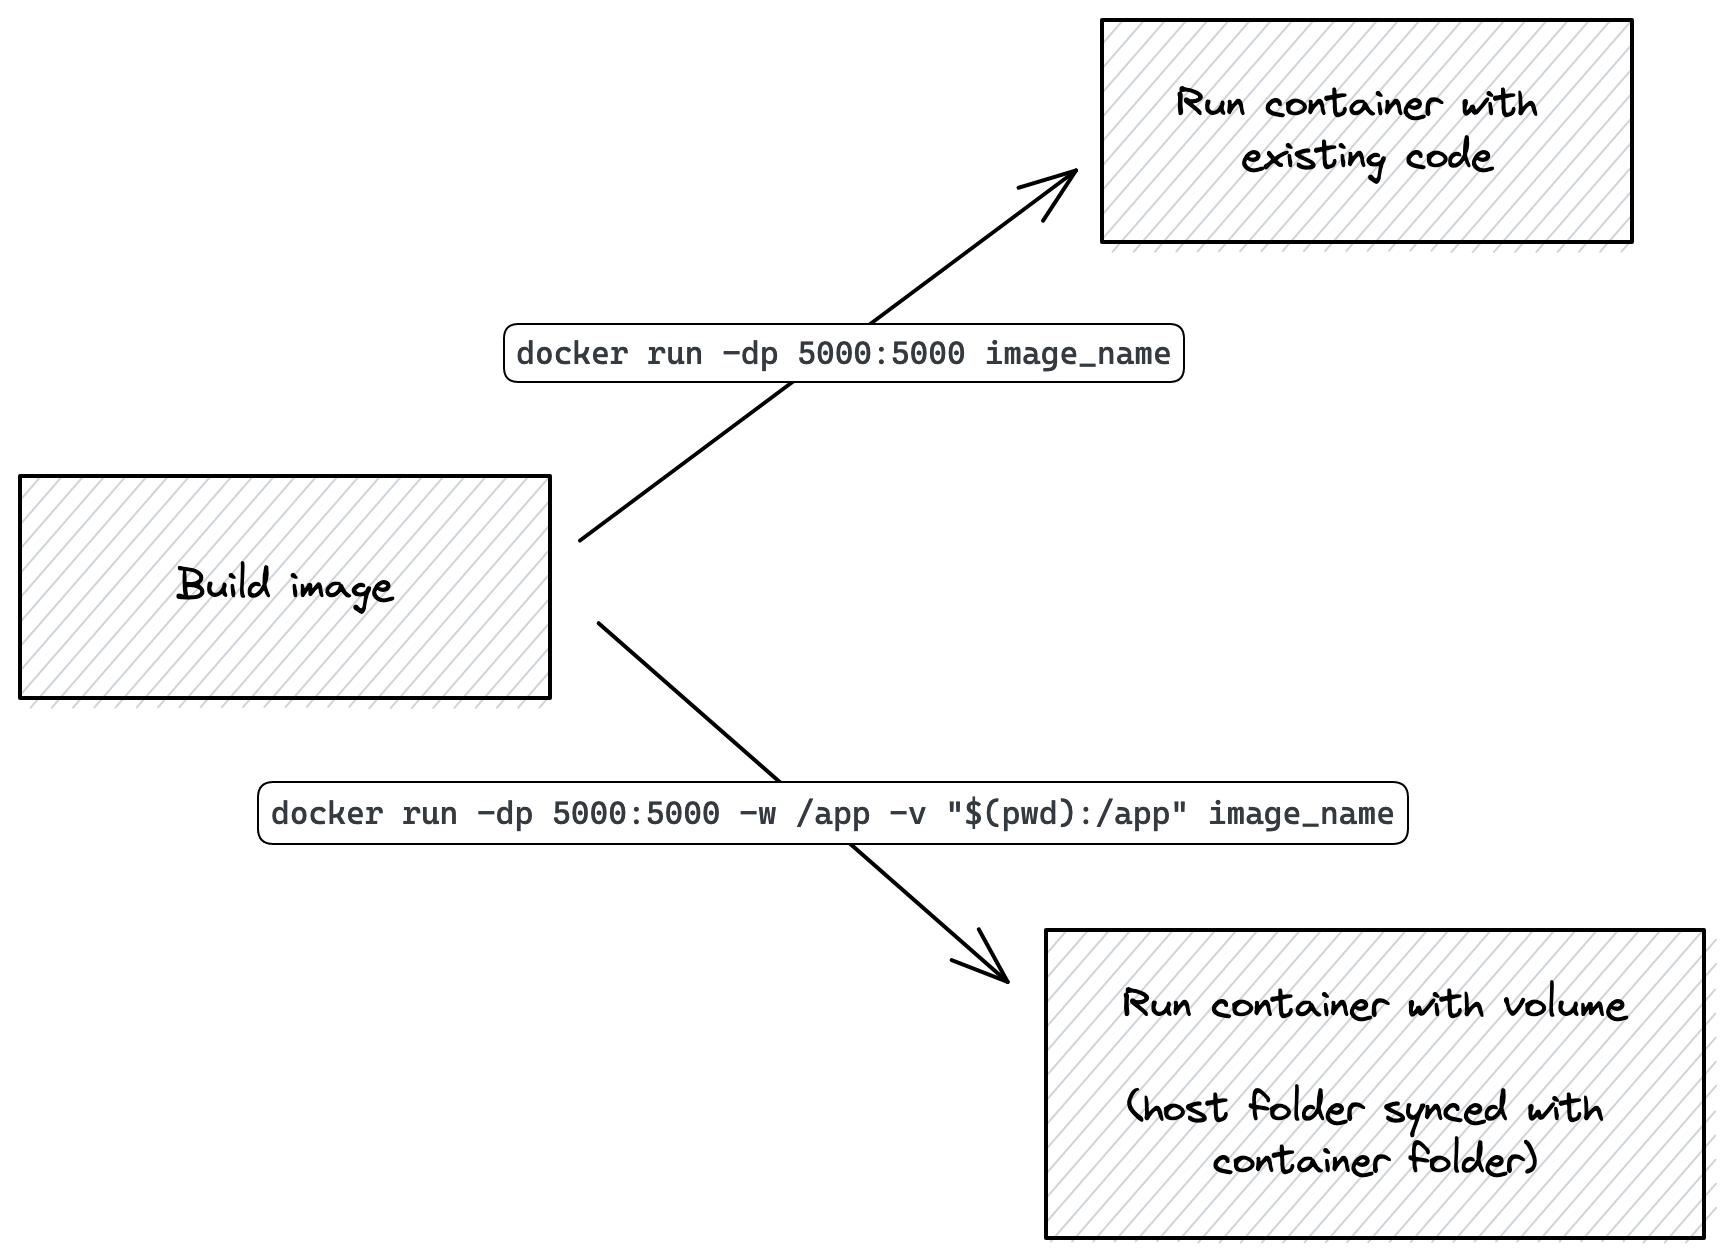
So at this point, we can run a container from this image, and it will run the app as it was when it was built:
docker run -dp 5000:5000 flask-smorest-api
This should just work, and you can try it out in the Insomnia REST Client to make sure the endpoints all work.
But like we said earlier, when we make changes to the code we'll have to rebuild and rerun.
So instead, what we can do is run the image, but replace the image's /app directory with the host's source code folder.
That will cause the source code to change in the Docker container while it's running. And, since we've ran Flask with debug mode on, the Flask app will automatically restart when the code changes.
To do so, stop the running container (if you have one running), and use this command instead:
docker run -dp 5000:5000 -w /app -v "$(pwd):/app" flask-smorest-api
The command on Windows is the same, but the paths have to be passed in differently:
docker run -dp 5000:5000 -w /app -v "/c/Documents/yourproject:/app" flask-smorest-api
Instead of /c/Documents/yourproject, use the path to your project (but remember to use /c/ instead of C:/).
-dp 5000:5000- same as before. Run in detached (background) mode and create a port mapping.-w /app- sets the container's present working directory where the command will run from.-v "$(pwd):/app"- bind mount (link) the host's present directory to the container's/appdirectory. Note: Docker requires absolute paths for binding mounts, so in this example we usepwdfor printing the absolute path of the working directory instead of typing it manually.flask-smorest-api- the image to use.
And with this, your Docker container now is running the code as shown in your IDE. Plus, since Flask is running with debug mode on, the Flask app will restart when you make code changes!
Using this kind of volume mapping only makes sense during development. When you share your Docker image or deploy it, you won't be sharing anything from the host to the container. That's why it's still important to include the original source code in the image when you build it.
Just to recap, here are the two ways we've seen to run your Docker container:
